Toast Timer

timer showing green

I recently started attending a Toast Masters group, which is an incredible way to boost your public speaking skills. However, our group did not have a consistent reusable timer setup for use with the group. Each member stepping into the role independently had to decide on their own method. This works pretty well, but when it was my turn, I took the opportunity to practice some JavaScript and wrote a quick web app to do the timing for me. http://www.nealbohling.com/code/toast-timer/

The goal of this tool is to quickly indicate to the speaker how far they are into their allotted time. This is accomplished through a progression of colors like a stoplight, an idea I took directly from Toast Master’s description of the role:

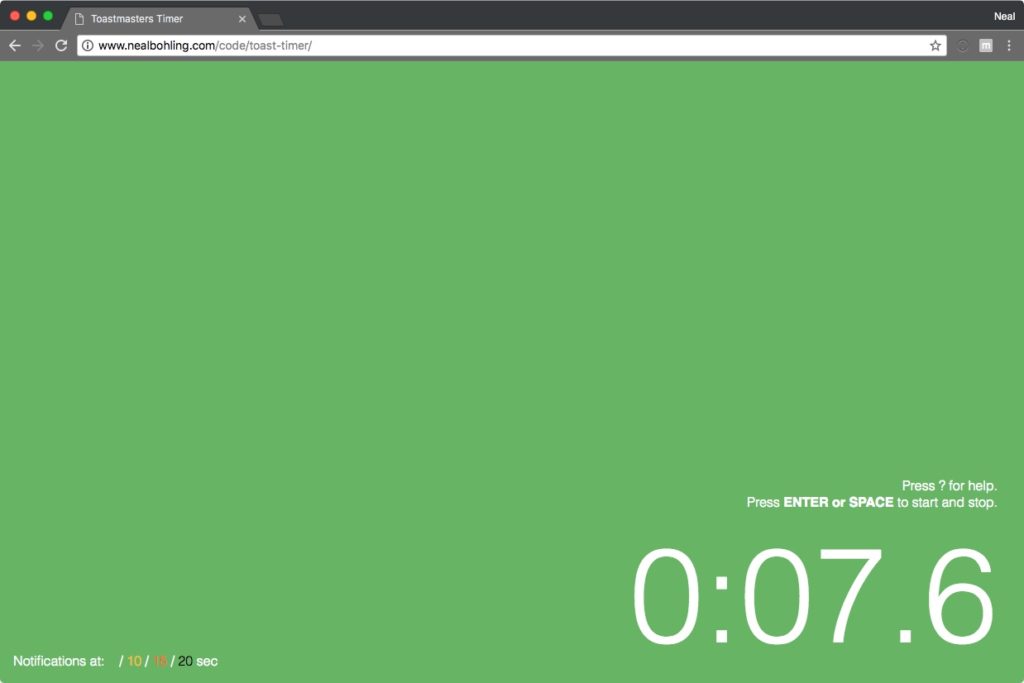
  1. Gray – indicates that the speaker has plenty of time, or that the timer is not running.
  2. Green – the speaker has crossed the first time threshold. No need to hurry, but start moving toward the end.
  3. Yellow – the speaker has crossed the second time threshold and should wrap up soon.
  4. Red – the speaker is now over time and should finish immediately.
  5. Black – way too long, shut it down.

For my implementation, the timing checkpoints are controlled by adjusting two numbers:

  1. The first time checkpoint (switch to green)
  2. The interval between checkpoints.

For example, most table topics are supposed to be between 1 an 2 minutes long with a hard stop at 2min 30sec. This timer accomplishes this by using a first checkpoint time at 1min and an interval of 30 seconds. With those values, the screen will turn green at 1min, yellow at 1min 30sec, red at 2min, and black at 2min 30sec. Longer speeches can use a first time at 3 minutes with 1 minute intervals, resulting in 3/4/5/6 for green, yellow, red, and black, respectively.

The app is primarily keyboard driven, which enables easy start/stop via the keyboard and quick time adjustment on the fly. This, however, proved to be slightly confusing and hard to pick up intuitively. So future iterations will expand to include mobile and mouse interactions, hopefully making it easier to learn and use in a variety of situations.

We’ve used this tool a couple of times, and found that putting it on the projector gives the speaker the best way to quickly reference their time, and the timer doesn’t have to spend their time swiveling their laptop around.

You can see a demo of the tool here, or grab the original code from GitHub. If you make any substantial improvements, I’d love to see them!

Square 101

It’s a new chapter for me. After 14years, 7months at IBM, I’ve decided to give it a go in a new arena. Square has given me a chance to work for them, and I took it.

The newest challenge for this job is learning Ruby. IBM zSeries uses a proprietary language, and so my exposure and experience in other languages is through side projects only. I have zero experience in Ruby or Ruby on Rails.

Some resources that have been useful so far are:

Ruby Koans — learn by editing little Ruby files

Getting Started with Rails — build a blog in Rails in about 20 minutes

So far, I love the fact that Ruby is a very expressive language and allows a lot more flexibility in expression. There are 5 ways to do everything, nothing is typed, and you can pass blocks of code around as Objects. Also, because it’s interpreted, there is no compile step which means you can test changes nearly immediately. Ruby has enterprise usages all over the world. I’m excited to step deeper and deeper into that arena.

Google OAuth2 using Hello.js

Code

My brother, a teacher and renowned idea man, set himself about solving a simple problem they were having at the school. He needed a quick and easy way to poll a spreadsheet while on a Google Form. Specifically, he wanted to do a quick check to see how many times a certain name showed up before hitting Submit. Google Forms does not allow this sort of background lookup while the Form is active, so we had to find another way. The solution we found is to self-host the Google Form HTML, and add a little JavaScript to do the background search through the spreadsheet. This solution has two tricky parts: authenticating to the Google Sheet (since we don’t want to make it public), and then actually doing the query. Turns out neither is difficult. This post will talk about the authentication method we used, and another time I’ll write about polling the spreadsheet.

Hello.js is the solution we used. This JavaScript library takes all of the difficulty out of doing authentication. It required one small tweak, but otherwise was a breeze. If you find yourself needing to do quick authentication using OAuth2.0 through Google or a large number of other social sites, I greatly recommend this library.

The documentation on the site is very good, but left out a few small details required to get it running. Here are the full steps of what I found it required to get authentication to Google SpreadSheets:

  1. Register your application as a web app at https://console.developers.google.com/project
    Note: this will require that you know where you’re going to put your site. Google uses the redirect_uri as an authentication, so make sure you know you keep this consistent with the redirect URI you include on the init call (see step 3). The redirect page also must include the hello.js in order for the authentication to work.
  2. Procure and include hello.js in your main page and on your redirect page. The redirect doesn’t need to do much except include hello.js.
    <script src="js/hello.js"></script>
  3. Initialize Hello.js by calling init and passing some relevant parms:
    hello.init( 
      {google : GOOGLE_CLIENT_ID },
      {redirect_uri:'redirect.html', 
        scope: 'sheets'}
    );

    Note the “scope: sheets”.. We’ll return to this later

  4. Call hello.login() from within your code. You can attach it to a button, or just call it from within your code.
  5. You can also generate a function to run when authentication returns. I used the example from their site.
  6. Once authenticated, store the token which you can get from the object returned from a call to hello(). Here is the code I used both to log in and capture the token:
    hello( 'google' ).login( function() {
      token = hello( 'google' ).getAuthResponse().access_token;
    });
  7. Now just include that token on your calls to Google!

That’s it! It’s quick and simple and takes a lot of the work out of doing OAuth2 authentication.

Now about the scope: hello.js is designed primarily for accessing profile data, such as name and photo. It doesn’t have a built-in scope for Google Spreadsheets. To allow me access to that, I had to update hello.js with a new scope type: sheets. This change is made inside hello.js during a call to itself. Do a quick search on “scope” and you’ll find the section. At the end, add “sheets: ‘https://spreadsheets.google.com/feeds’ “. You can then include “sheets” as a scope parameter on your init() call.

// Authorization scopes
scope : {
  //,
  basic : "https://www.googleapis.com/auth/plus.me https://www.googleapis.com/auth/userinfo.email https://www.googleapis.com/auth/userinfo.profile",
  email : '',
  birthday : '',
  events : '',
  photos : 'https://picasaweb.google.com/data/',
  videos : 'http://gdata.youtube.com',
  friends : 'https://www.google.com/m8/feeds, https://www.googleapis.com/auth/plus.login',
  files : 'https://www.googleapis.com/auth/drive.readonly',
  publish : '',
  publish_files : 'https://www.googleapis.com/auth/drive',
  create_event : '',
  offline_access : '',
  sheets : 'https://spreadsheets.google.com/feeds'
}

And there you have it. Just a quick edit, and a few JavaScript calls and you can easily OAuth your way into your private spreadsheets.


Dijkstra, JavaScript, and d3.js

dijkstra

I recently came across a JavaScript library that helps visualize data by pairing data to the DOM, allowing easy HTML generation based on arrays of data. It is a neat idea, and allows for a lot of easy flexibility, so I wanted to give it a try. (http://www.d3js.org)

At the same time, I’ve been wanting to revisit some of the classic computer science algorithms I learned over 10 years ago. In this case, Dijkstra’s. I remember trying to implement Dijkstra’s algorithm in college and never being quite sure that it worked, so I had been wanting to refresh my memory and give it another go.  Dijkstra’s is a fairly visually-oriented algorithm, so it seemed to be a good fit for exploring d3’s capabilities.

I’m fairly satisfied with the results.  The basics layout is a simple grid of vertices joined by edges or random weight. Click any two to set the algorithm in motion.

A few notes of interest about the process:

  • Dijkstra’s has no direction-optimization; it spreads in all directions all at once. This opens up some interesting questions about how to optimize the algorithm by helping it understand where it is headed. It also means that if you cached the distance values, the next time you needed to find a distance from the same start point, you’d be able to skip a lot of the process.
  • OO in JavaScript is easy and powerful.
  • The scope of variables in JavaScript is an easy place to make mistakes.
  • d3.js is fantastic! It allows you to pair your data directly to any part of the DOM, so updates to the data can be mirrored quickly in the HTML. This gives you a lot of control, and at the same time, a lot of options for displaying your data. In this case, I paired my Vertex objects directly to the SVG root element, so it auto-generates all of the vertex and edge SVG elements for me.

Feel free to take a look at my code, and let me know what you think.